Using CSV Data Set in Load Tester (multiple remote servers) Powered by Apache JMeter™ (updated version)
How to use CSV Data Set in JMeter to read values from a file and use them for load testing in the Load Tester.

Load Tester (multiple remote servers) Powered by Apache JMeter™ is designed to run distributed tests with Apache JMeter™ from multiple servers on Microsoft Azure to perform large-scale load testing.
Apache JMeter™ creates a huge load with a lot of remote hosts, and this solution allows you to build it up in a very short time of operation.
If you want to pass a different parameter value for each request in JMeter, you can prepare the values in a CSV file.
This CSV file must be distributed to all JMeter servers when running JMeter remote tests.
In this tutorial, I will show you how to do it in the Load Tester environment.
This content is for Load Tester (multiple remote severs) Powered by Apache JMeter deployed on or after January 20, 2021.
If you are using an older version of Load Tester, please see Contents for older versions.
Outline of steps
- Configure synchronization between files on the shared disk and the local disk of the JMeter server
- Prepare a CSV file
- Restart JMeter Servers
- Configure CSV Data Set Config to import values from a CSV file
- Use that values in the sampler
- Add the listener
- Execute the load test
- Confirm the results
Details of steps
-
Configure synchronization between files on the shared disk and the local disk of the JMeter server
Files and directories in the shared disk /mnt/jmuserdata will be synchronized to the JMeter server for the directory set in the /mnt/jmuserdata/sync.to file.
Edit the /mnt/jmuserdata/sync.to file in the JMeter client.e.g. /mnt/jmuserdata/sync.to
/mnt/resources/jmuserdataThis will create a symbolic link in the JMeter client.
(In this example, /mnt/resources/jmuserdata -> /mnt/jmuserdata) -
Prepare a CSV file
In the JMeter client, create a CSV file that will be the test data in the directory of the symbolic link that was created(/mnt/resources/jmuserdata).e.g. /mnt/resources/jmuserdata/chemicalelements.csv
atomic_number,symbol,element 1,H,Hydrogen 2,He,Helium 3,Li,Lithium 4,Be,Beryllium 5,B,Boron 6,C,Carbon 7,N,Nitrogen 8,O,Oxygen 9,F,Fluorine 10,Ne,Neon -
Restart JMeter servers
When the JMeter servers are started, the files in /mnt/jmuserdata are synchronized to the local disk according to the previous configuration.
Restart the virtual machine scale set of JMeter servers in Azure Portal.
The virtual machine scale set of the JMeter servers are created with the name that you specified as the virtual machine scale set name of the JMeter Servers when you installed Load Tester.
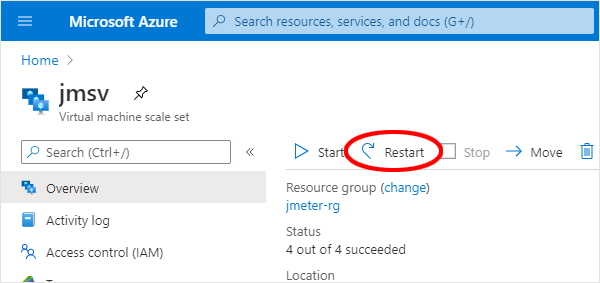
This will restart all JMeter servers at once and synchronize the CSV data files to JMeter servers. -
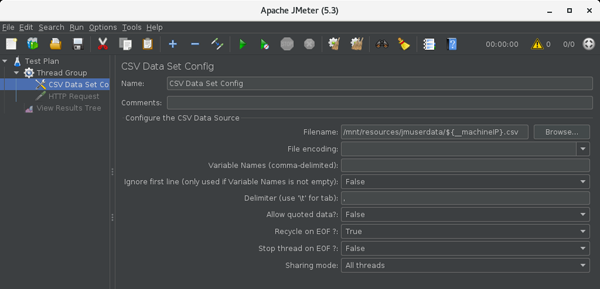
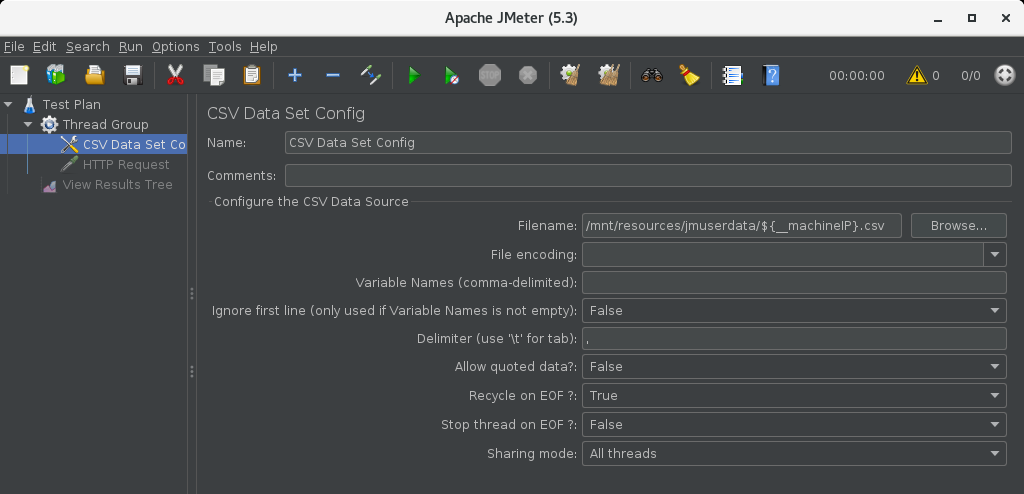
Configure CSV Data Set Config to import values from a CSV file
- Launch the JMeter on JMeter client.
- Add a “Thread Group” to the Test Plan
Add > Threads (Users) > Thread Group
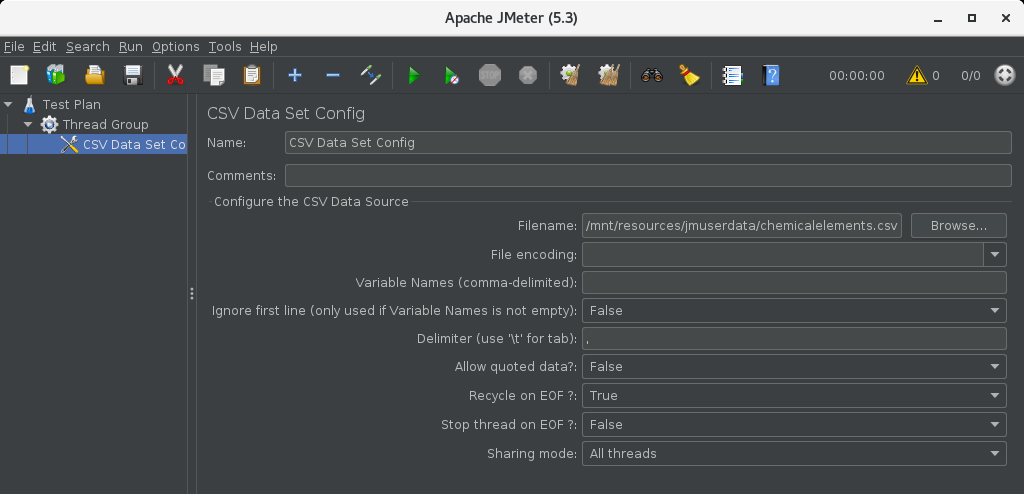
“Loop Count” should be set to “3” and so on. - Add a “CSV Data Set Config” to the Test Plan or the Thread Group
Add > Config Element > CSV Data Set Config
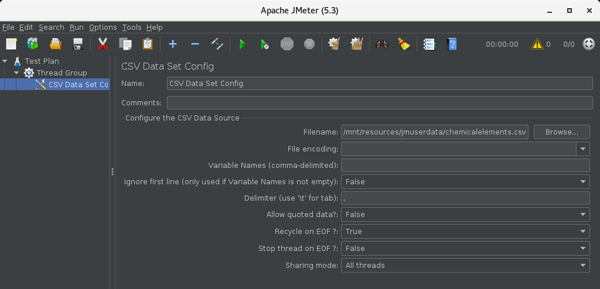
- Configure the CSV Data Source
- Filename: The CSV file name you just created
- Variable Names (comma-delimited): If the CSV file does not have a header line, separate the column names with a comma.
- Configure the CSV Data Source
-
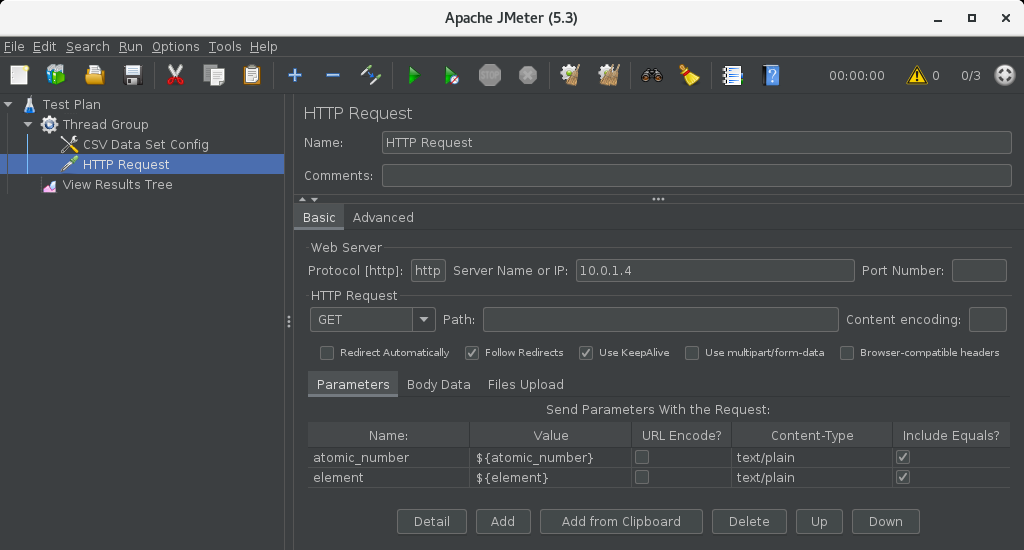
Use that values in the sampler
In this case, use the HTTP Request sampler to assign the CSV file data as a QueryString of the GET request.
The values in the CSV file can be assigned by writing “${COLUMN_NAME}”.Add a “HTTP Request” sampler to the Thread Group
Add > Sampler > HTTP Request

- Web Server
- Protocol [http]: Protocol (http or https)
- Server Name or IP: Server name or IP Address of the target
- HTTP Request
- (Method) GET
- Parameters
Click “Add” and add parameters- Name: Parameter name (e.g. element)
- Value: Paramaeter value (e.g. ${element})
- Web Server
-
Add the listener
Add a “View Results Tree” to the Test Plan or the same Thread Group to confirm that it works.
Add > Listener > View Results Tree -
Execute the load test
MENU > Run > Remote Start All -
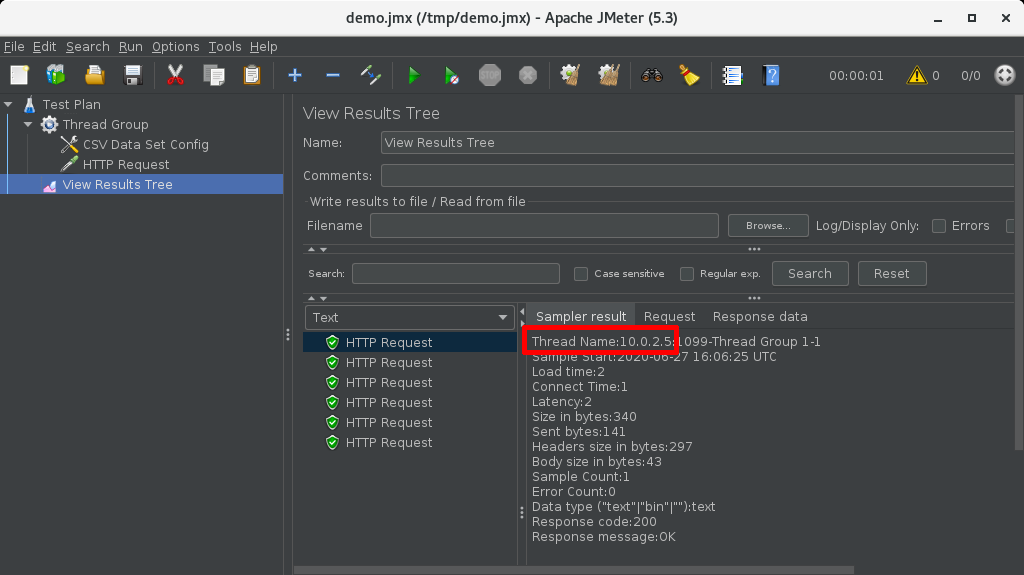
Confirm the results
View Results Tree to check some HTTP requests.- Sampler result tab
The IP address of the JMeter Server that has been accessed is displayed in the Thread Name.
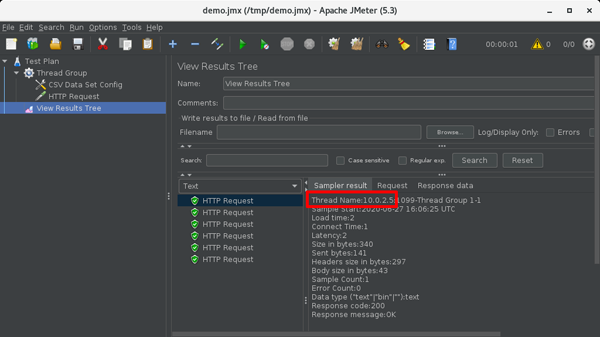
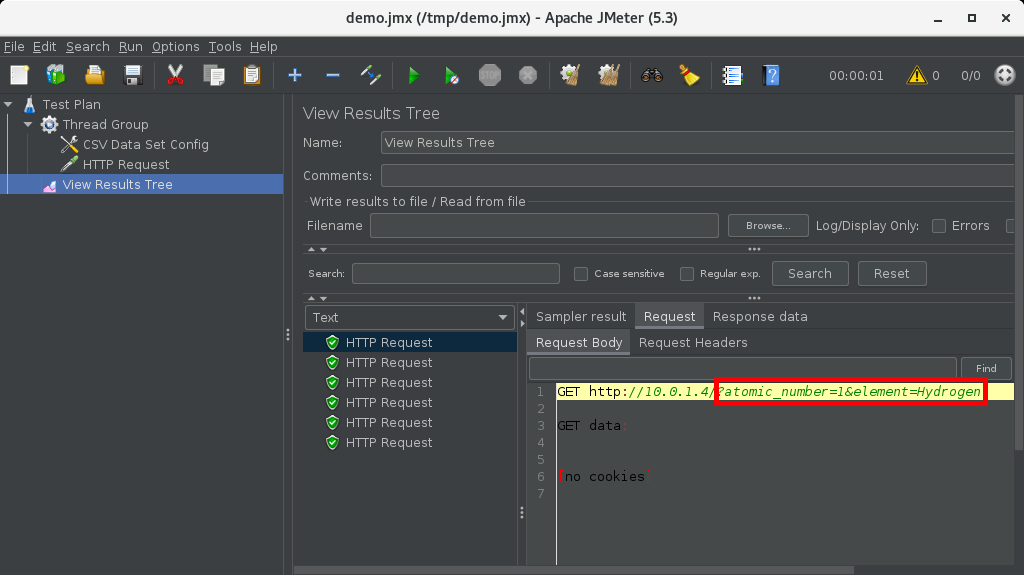
- Request > Request Body tab
The QueryString in the url shows the value of the CSV file.

- Sampler result tab
Use different CSV files for each JMeter servers
Next, make requests using different CSV files on each of the three JMeter servers.
Change the configurations from the aforementioned CSV file.
-
Prepare CSV files
-
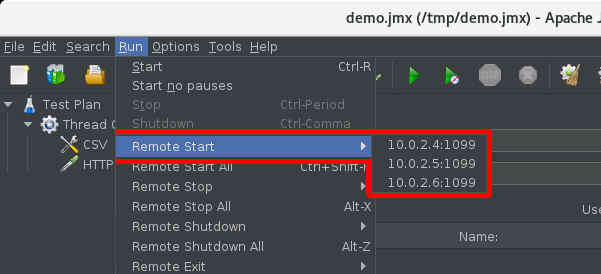
Know the IP address of each JMeter servers Include the IP address of the JMeter servers in the file name or directory name of the CSV file so that the JMeter servers can determine which CSV file to use.
Open the JMeter’s menu > Run > Remote Start and note the list of IP addresses that appear there.(No port number is required)
-
Create CSV files with each IP addresses as its name
e.g.
/mnt/resources/jmuserdata/10.0.2.4.csvatomic_number,symbol,element 1,H,Hydrogen 2,He,Helium 3,Li,Lithium 4,Be,Beryllium 5,B,Boron 6,C,Carbon 7,N,Nitrogen 8,O,Oxygen 9,F,Fluorine 10,Ne,Neon/mnt/resources/jmuserdata/10.0.2.5.csv
atomic_number,symbol,element 11,Na,Sodium 12,Mg,Magnesium 13,Al,Aluminium 14,Si,Silicon 15,P,Phosphorus 16,S,Sulfur 17,Cl,Chlorine 18,Ar,Argon 19,K,Potassium 20,Ca,Calcium/mnt/resources/jmuserdata/10.0.2.6.csv
atomic_number,symbol,element 21,Sc,Scandium 22,Ti,Titanium 23,V,Vanadium 24,Cr,Chromium 25,Mn,Manganese 26,Fe,Iron 27,Co,Cobalt 28,Ni,Nickel 29,Cu,Copper 30,Zn,Zinc
-
-
Restart JMeter servers
Restart the virtual machine scale set of JMeter servers in Azure Portal. -
Use a CSV file that contains the IP address of the JMeter server itself in its name in CSV Data Set Config
In the Filename field of “CSV Data Set Config”, enter the file name with the IP address portion replaced by “${__machineIP}”.
e.g. /mnt/resources/jmuserdata/${__machineIP}.csv
-
Execute the load test
MENU > Run > Remote Start All
* No changes are required for samplers or listeners. -
Confirm the results
View Results Tree to see some HTTP requests.
Make sure the combination of the IP address output to Sampler result and QueryString output to Request > Request Body matches the CSV file you created.
This is the end of this tutorial.