Build a bunch of Apache JMeter™ remote servers to Azure in just 5 minutes of operation.
This article explains how to deploy multiple Apache JMeter™ remote servers on Azure by using “Load Tester (multiple remote servers) Powered by Apache JMeter™”

To create a very large load using Apache JMeter™, you could build a bunch of JMeter servers and control them from the JMeter client to make requests to them simultaneously.
All these JMeter servers need to be set up with the same configuration.
If you were to build 100 JMeter servers, “where”, “how” and “how long” would you build them?
100 PCs or servers?
Virtualized environment such as vmware?
On the cloud?
Install OS and JMeter one by one?
Create a virtual machine image or container image for vmware or cloud and then deploy it?
What if the test requirements change after the build and I need to add a new JMeter Plugin or test data?
How do you update the OS (distribution) and JMeter for the installed PC or created images?
Could it be a reimagining?
How long does it take to prepare for these?
Using Load Tester (multiple remote servers) Powered by Apache JMeter™, you can build many JMeter servers and the JMeter client that control them on Microsoft Azure in a very short time of operation.
Here’s how to build that with Azure Portal.
Requirement
- Have a Microsoft Azure subscription that allows you to create Virtual Machines, Storage Accounts, etc.
Outline of steps
- Visit the Azure portal
- Create a virtual network
- Deploy Load Tester from Azure Marketplace
- Check the operation
Details of steps
-
Visiting the Azure Portal Visit the Azure Portal and login.
https://portal.azure.com -
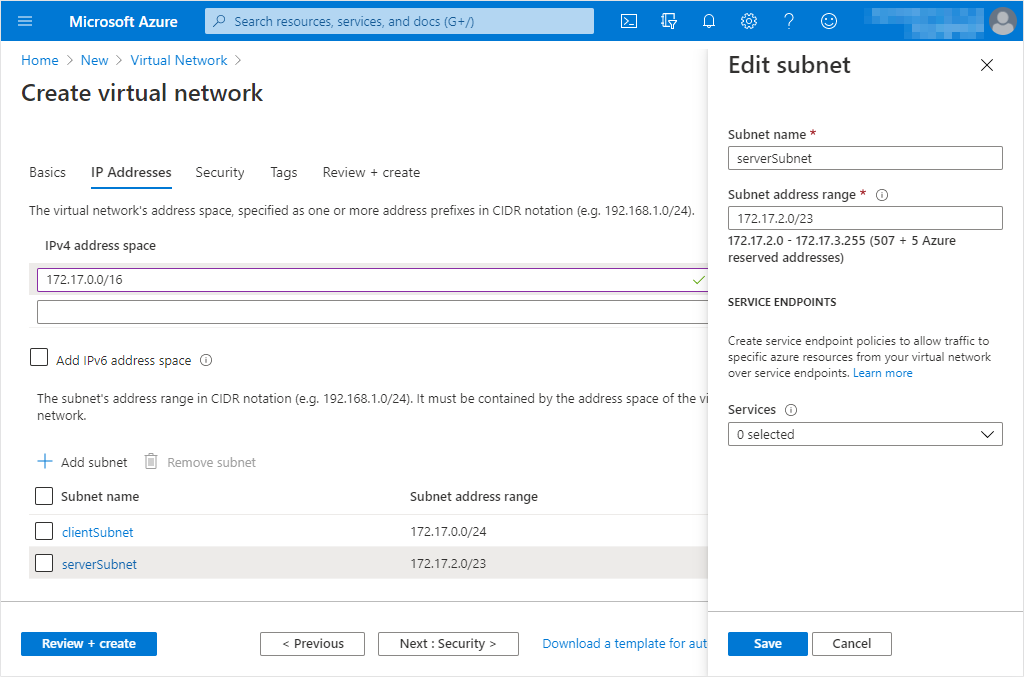
Creating a virtual network Create a virtual network to place the JMeter client and JMeter servers virtual machines.
Two subnets are required, one for the JMeter client and one for the JMeter server.
It is possible to use an existing virtual network, but in that case, one subnet must be empty with no resources for the JMeter servers.

- Especially if you have a large number of JMeter servers, make sure that the subnet for the JMeter servers has a sufficient address range to accommodate them.
- If you are connecting to other VNets of Azure by VNet peering, etc., or connecting to on-premises or other cloud services via VPN or ExpressRoute, please do not conflict with the address range.
- The Load Tester does not currently support IPv6 subnets.
-
Deploying Load Tester from Azure Marketplace
-
Search for “jmeter pnop” in “Create a resource” Select “Load Tester (multiple remote servers) Powerd by …” from the two search results.
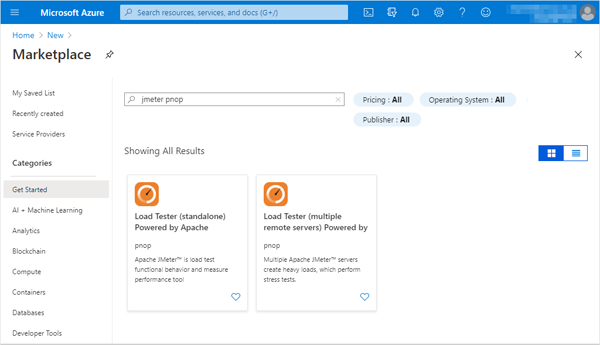
You can also access it directly from the following URL.
https://portal.azure.com/#create/pnop.jmeter-multiple-remote-serversjmeter-multiservers -
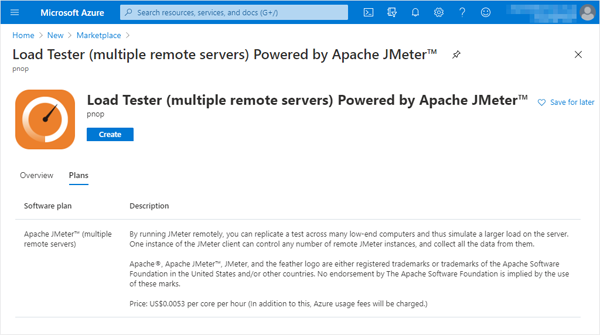
Create after confirming contracts and plans (price)

-
“Basics” tab

- Resource group
Create a new one or select an existing empty resource group. - Region
Select the region where you want to create the JMeter Client and JMeter Servers.
Select the same region as the virtual network you just created. - Username
Username to connect to JMeter client and JMeter servers virtual machines. - Authentication type Select the authentication method for SSH connection.
- If you choose “Password”
- Password / Confirm password Password of the user connecting to the JMeter client and JMeter servers virtual machines.
- If you choose “SSH Public Key”
- SSH public key Public key of the user connectiong to the JMeter client and JMeter servers virtual machines.
- Password for Remote Desktop connection / Confirm password Password of the user connectiong to the JMeter client via Remote Desktop connection.
- Resource group
-
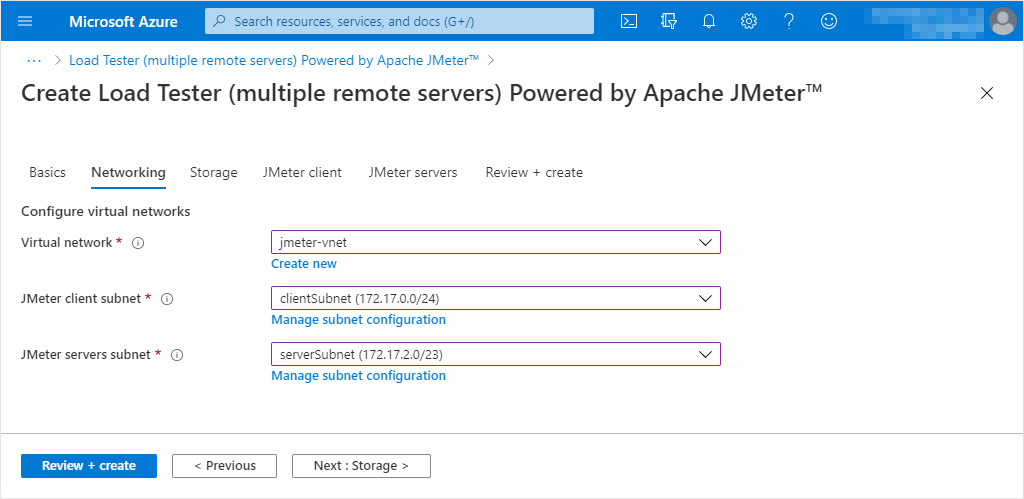
“Networking” tab

- Virtual network
Select the virtual network you just created.
You can also choose to create a new one, but due to a bug in the Azure Marketplace, you may not be able to create the virtual network with the configuration you want. - JMeter client subnet
Select the subnet for the JMeter client virtual machine. - JMeter server subnet
Select the subnet for the JMeter servers virtual machines.
This subnet needs to be empty with no other resources.
- Virtual network
-
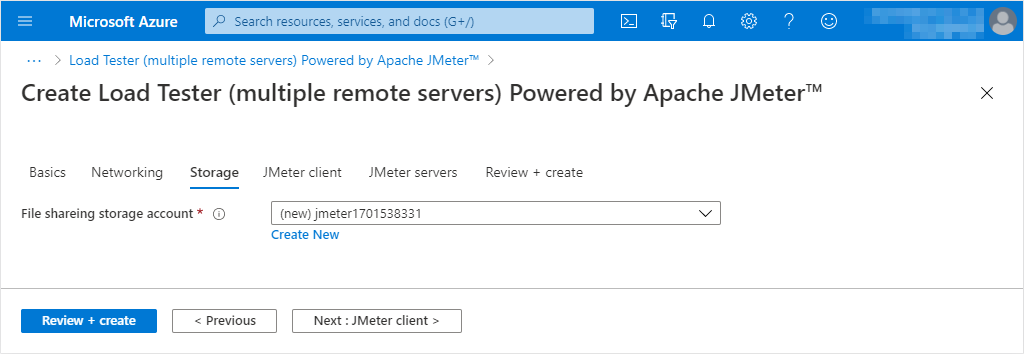
“Storage” tab

- File sharing storage account
Create a new Azure Files that will be mounted by the JMeter client and JMeter server.- Existing storage accounts cannot be used at this time.
- When creating a new account, you can select “Storage (general purpose v1)” for the account type, but this will be ignored and it will be created using “StorageV2 (general purpose v2)”.
- File sharing storage account
-
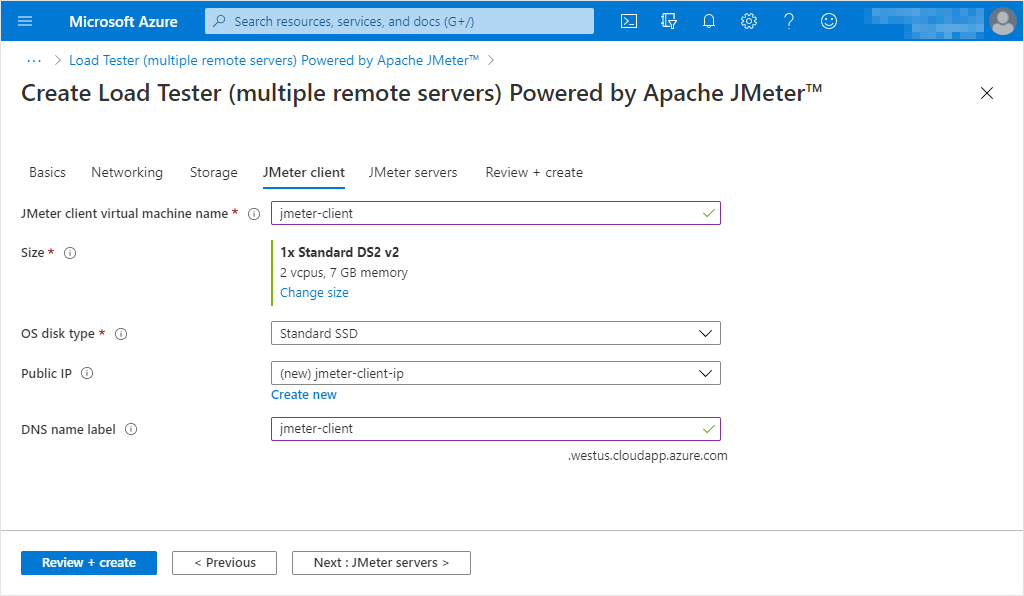
“JMeter client” tab

- JMeter client virtual machien name
Virtual machine name of JMeter client. - Size
Instance size of JMeter client virtual machine.
The JMeter client requires high performance when running tests on many JMeter servers. - OS disk type
Select OS disk type of JMeter client virtual machine.
Standard SSD is recommended.
* Cannot choose a Premium SSD at this time. - Public IP
Create a new or select existing public IP to connect to the JMeter client from the internet. - DNS name label
Set this value to connect to the JMeter client from the Internet by specifying the server name.
It is recommended that you set this value to something easy to remember.
If this is not specified, the connection will be made with an IP address.
- JMeter client virtual machien name
-
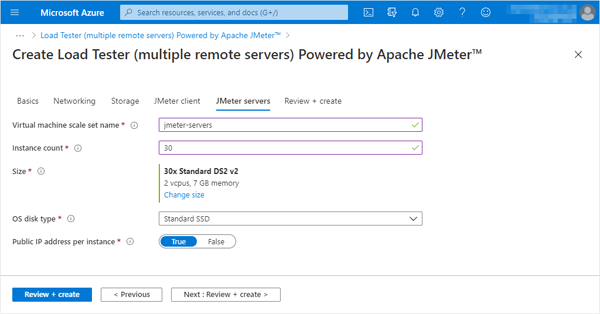
“JMeter servers” tab
-
Virtual machine scale set name
Virtual machine scale set name of JMeter servers. -
Instance count
Number of JMeter servers virtual machines.
When creating many JMeter servers, be aware of the subscription limits (vCPUs, public IP addresses, etc.). -
Size
Instance size of JMeter servers virtual machines. -
OS disk type
Select OS disk type of JMeter servers virtual machines.
Standard SSD is recommended.
* Cannot choose a Premium SSD at this time. -
Public IP address per instance
Select whether or not to assign a public IP address to each JMeter servers.
True if each virtual machine has a public IP address, False otherwise.This setting is useful for testing targets on the Internet.
By giving them each a public IP address, the testers receive requests from the IP address of each virtual machine.
If not assigned individually, requests from all JMeter servers will be requests from one IP address.
-
-
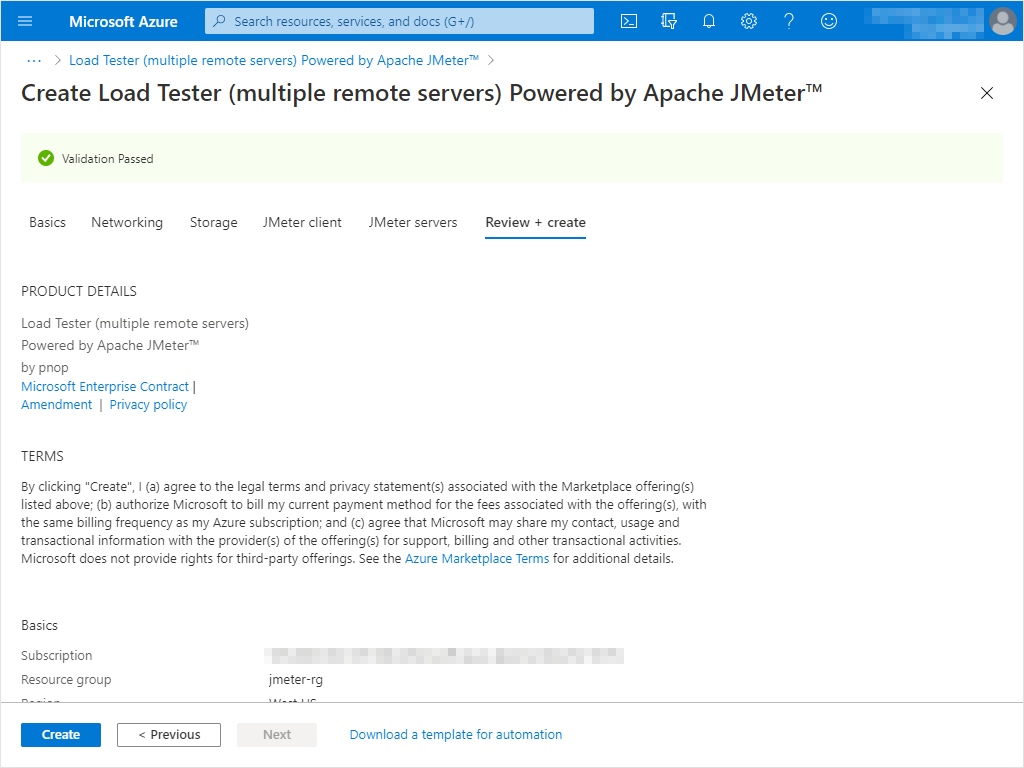
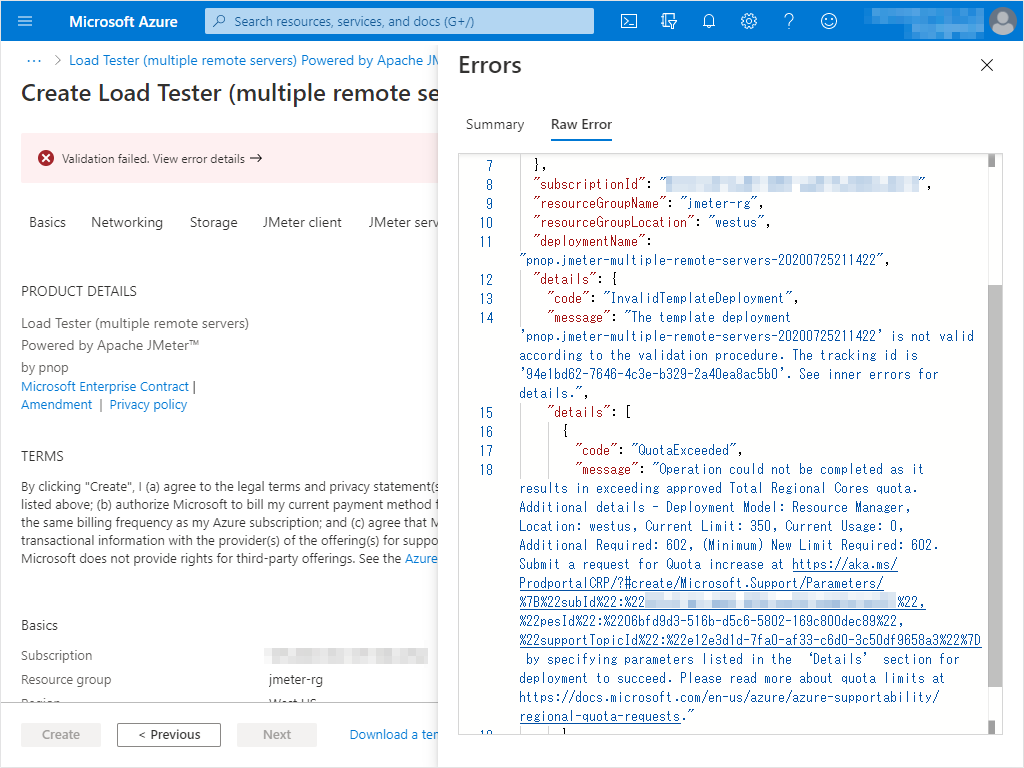
“Review + create” tab
Confirm the settings and click “Create”.

If the verification fails, please check for errors.
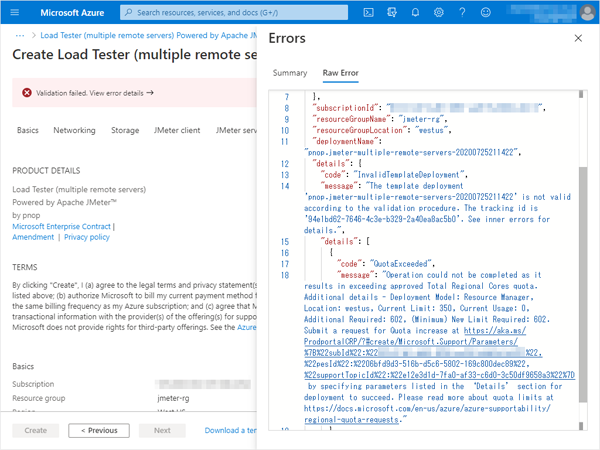
The error in this image is due to too many JMeter servers and exceeding the subscription limit.
In these cases, you can either reduce the number of JMeter servers or contact Azure support to increase the number of targeted vCPUs. -
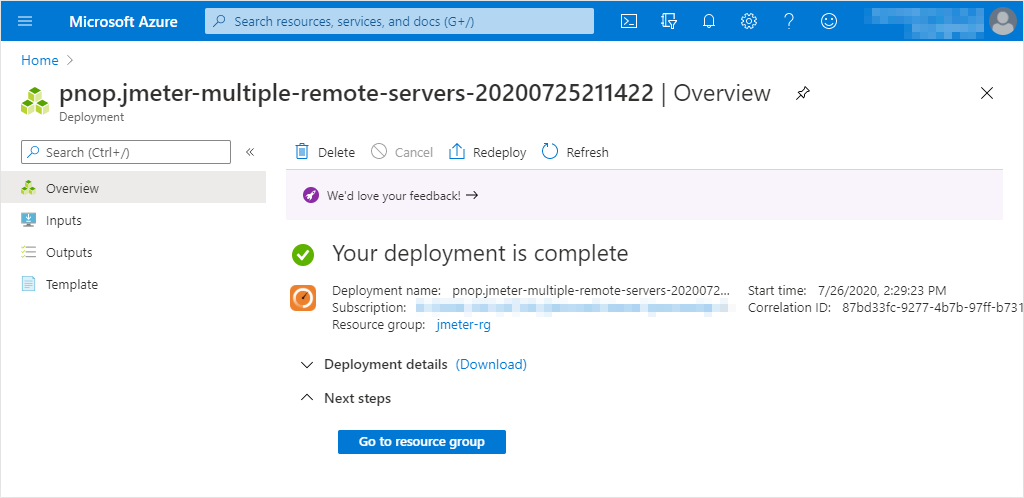
Deployment The build operation is complete.
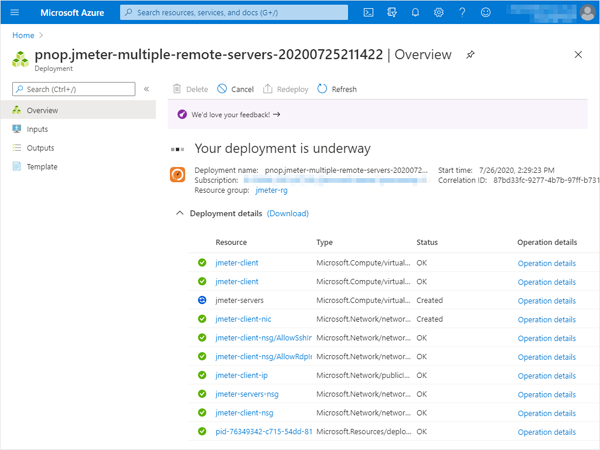
It may take some time for the whole environment to be completed, such as when creating a large number of Meter servers, but please wait for it.

-
-
Operation check of Apache JMeter™
- Check the name or IP address of the server you are connecting to
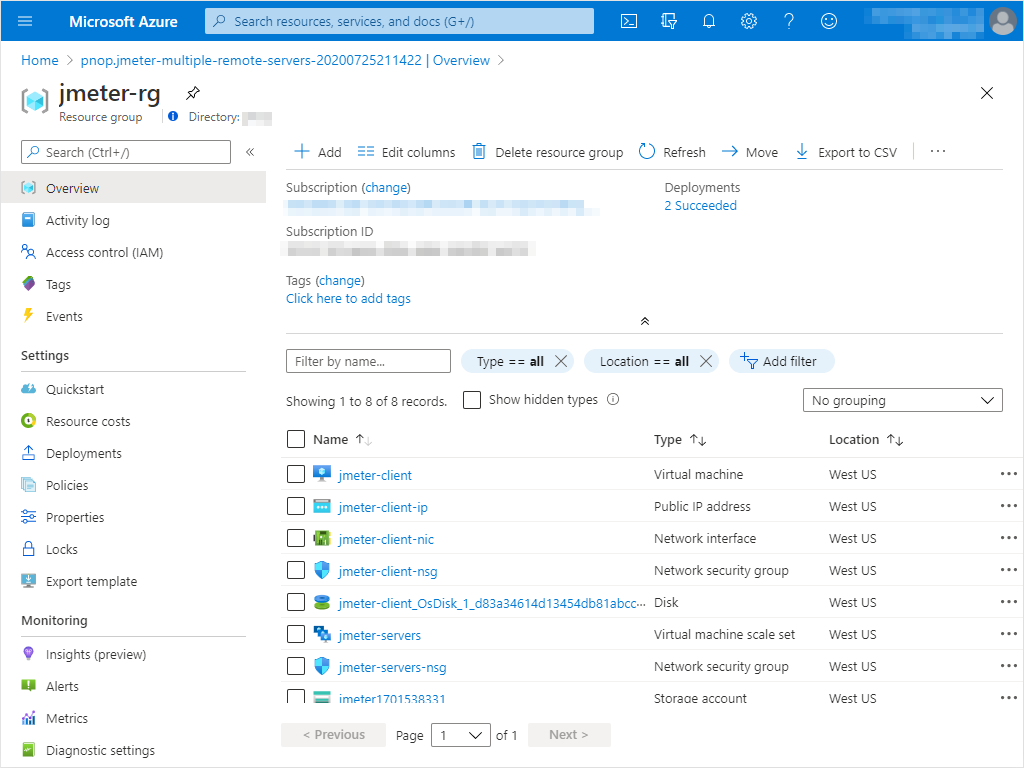
- In Azure Portal, display the resource groups you created in the “Basic Tab” when you created the Load Tester.
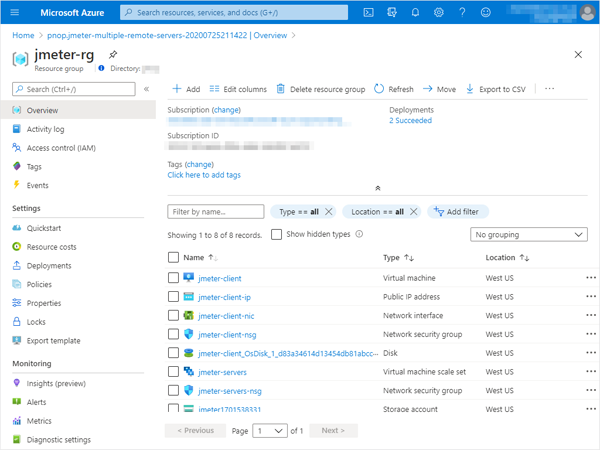
- View public IP address details
Click the resource whose type is “Public IP Address”.
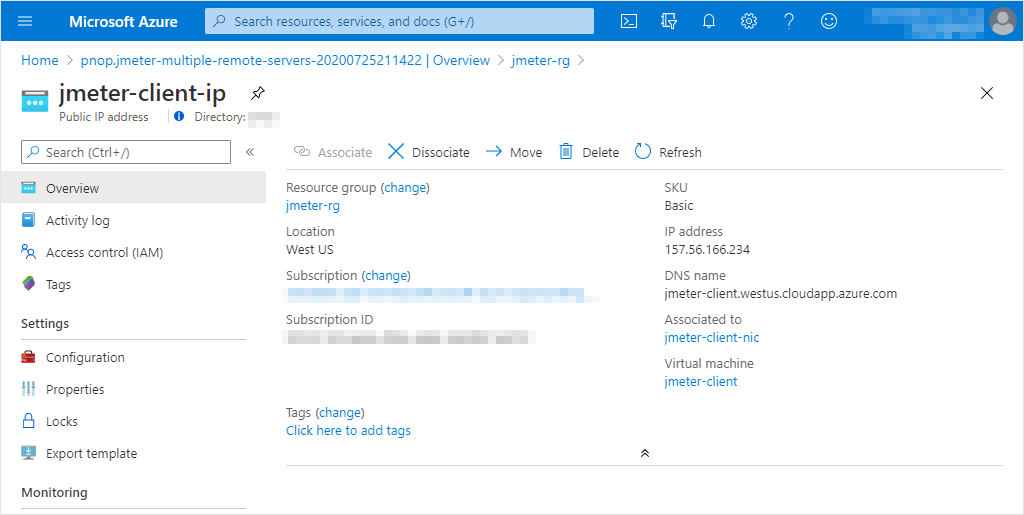
(“jmeter-client-ip” in the image above) - Check the “DNS name” or “IP address”
Note the “DNS name” or “IP address” in the Overview.
- In Azure Portal, display the resource groups you created in the “Basic Tab” when you created the Load Tester.
- Launch “Remote Desktop connection”
- Windows
Launch “Remote Desktop connection” from the start menu.

- macOS
Use Microsoft Remote Desktop for macOS.
If you don’t have it, please download it from the Mac App Store or App Center.
- Windows
Launch “Remote Desktop connection” from the start menu.
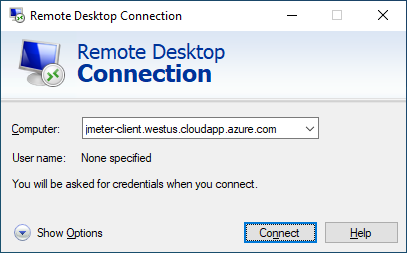
- Specify the JMeter client as the computer to connect to
Connect by specifying the “DNS name” or “IP address” of the public IP address you just checked in the Computer.
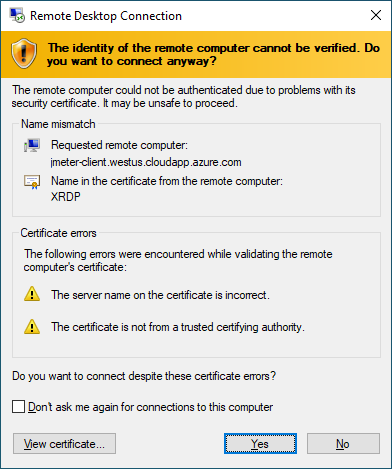
- Ignore certificate error
You get an error saying there is a problem with the certificate, but Ignore it and connect.
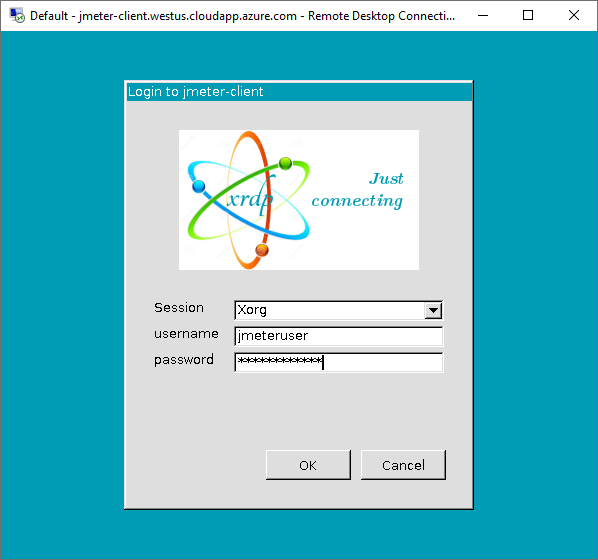
- Login
Login with the username and password you entered in the “Basic Tab” when you created the Load Tester.
- Launch Apache JMeter™
Double-click on “JMeter” on your desktop to launch it.

- Apache JMeter™ has started
You can confirm that the JMeter servers are registered from [Run] > [Remote Start] in the menu.
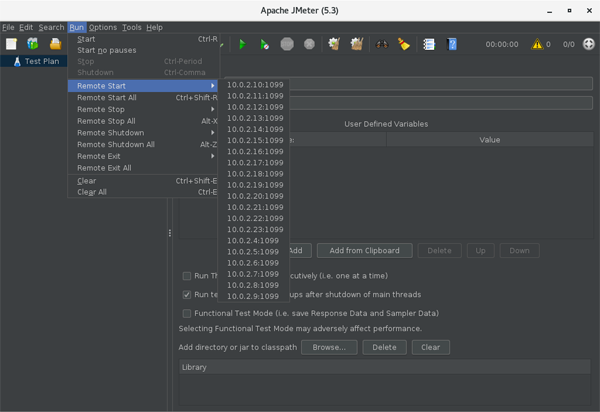
- Please create a suitable test scenario and test it.
- Check the name or IP address of the server you are connecting to
-
Improve security
Immediately after deploying Load Tester, JMeter client can connect with ssh and remote desktop from anywhere.
Configure the Azure Network security group (NSG) so that it can only connect from a specific network.- Access to the Azure Portal
https://portal.azure.com - Configure the Network security group
- View resource group
In Azure Portal, display the resource group you created in the “Basic Tab” when you created the Load Tester.
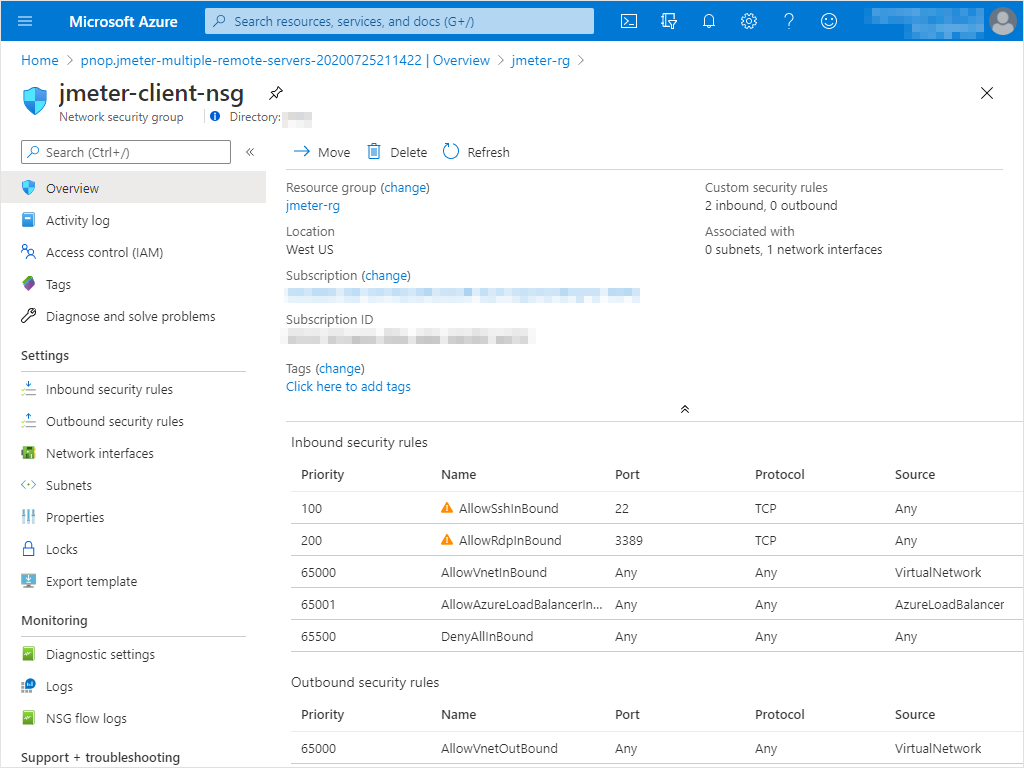
- View network security group details
Click the resource of type “Network security group” to display the NSG.
(“jmeter-client-nsg” in the image above)

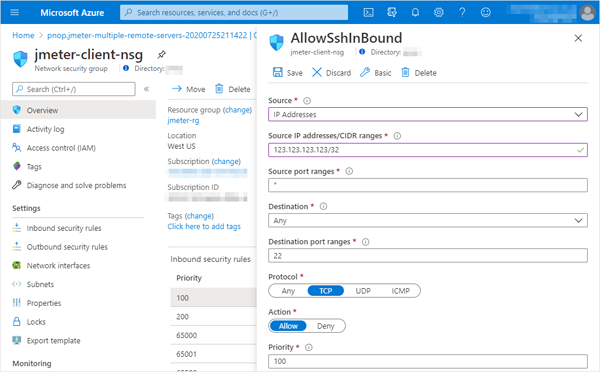
- Restrict source networks that allow ssh connections
Click on “AllowSshInBound” in the list of “Inbound security rules” to restrict sources to only the source networks that allow ssh connections.
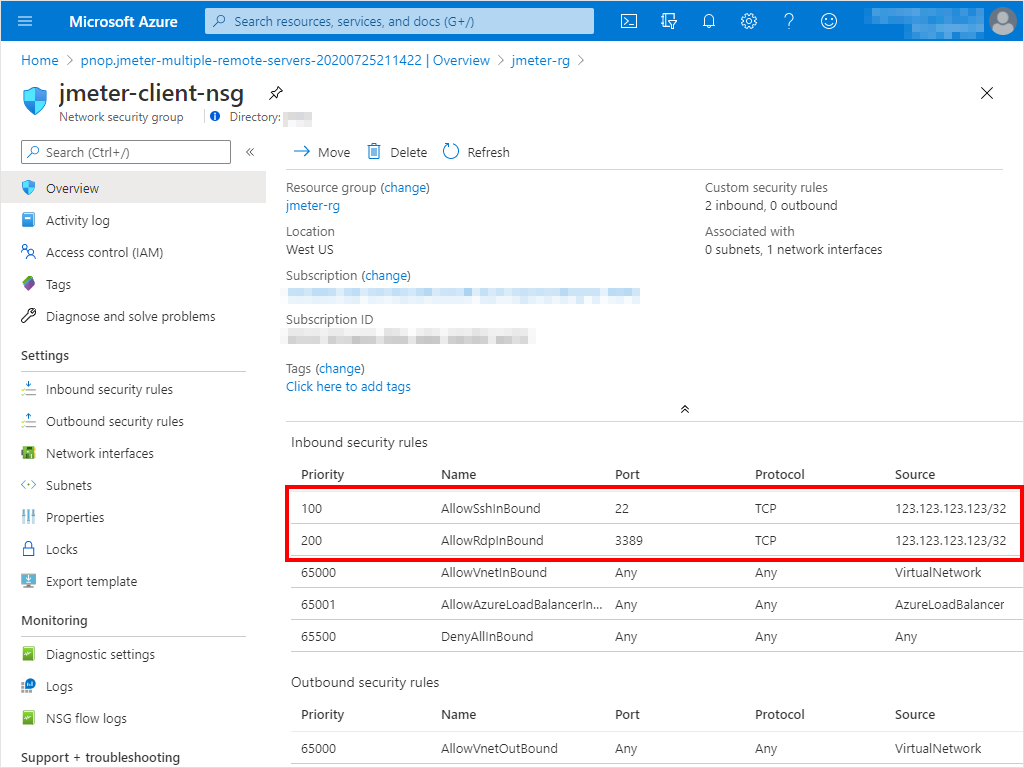
To allow connection from only one PC from the Internet, set as follows and “save”.
- Restrict source networks that allow Remote Desktop connections Set “AllowRdpInBound” in the list of “Inbound security rules” as well as ssh.
- Check the settings
In the Inbound Security Rules list, make sure that AllowSshInbound and AllowRdpInbound are at the values you set.

- View resource group
In Azure Portal, display the resource group you created in the “Basic Tab” when you created the Load Tester.
- Access to the Azure Portal


By using Load Tester (multiple remote servers) Powered by Apache JMeter™, I have shown that you can create an environment to load test with a lot of Apache JMeter™ servers “easily and quickly”.